
Different people sand the floor for different reasons. It might be a restoration job aiming to alter the colour or finish treatment, or the carpeting has been removed, and the underlying flooring is being restored to its former glory. Floor sanding, whether for a new or existing installation, is all about preparing a clean, bare surface to apply treatments and finishes that will make the floor seem brand new without replacing the boards below. There is no set number of times that wood floors need to be refinished; the number of times will depend on the thickness of the boards. Refinishing hardwood floors is a job best left to refinishing hardwood floors contractors to prevent damage and prolong the life of your floor from being weakened by over-sanding.
The process is detailed and takes into consideration a lot of different factors. Let’s get into the nitty-gritty of the procedure of sanding the floor.
Necessary Preparation for Floor Sanding
Strip off old floor coverings: Make sure that any previous floor coverings have been entirely removed from the area that you are going to be sanding. This will include any carpets, materials, rugs, edges that have been nailed or stapled, and any other similar items.
Ensure there are no protruding nails: You need to make sure that any nails that are still in the area that you’re sanding are at least 4 millimetres (mm) below the surface.
Add putty to nail holes: After the nail holes are filled with putty, the holes should be sealed off with a coat of varnish.
Ensure you have a clean floor before you start: Sanding floors requires a very comprehensive assessment of the surrounding area. Doing this check will save you from losing a lot of time (or possibly causing damage) once you begin the task. Before you start sanding the floor, you need to clear the area thoroughly by dusting, sweeping, and vacuuming so that you have a fully empty and clean surface.
Cordon off the space you’re working in: Take every precaution to ensure that the area in which you are working is as secure as possible. If you were to walk out of the room where you were enjoying your hard work and discover that the rest of the home was covered in dust because you were sanding floors, it would be such a shame. Make certain that anybody else who may be around is aware of what is happening and that everyone, including dogs, stays away from the area.
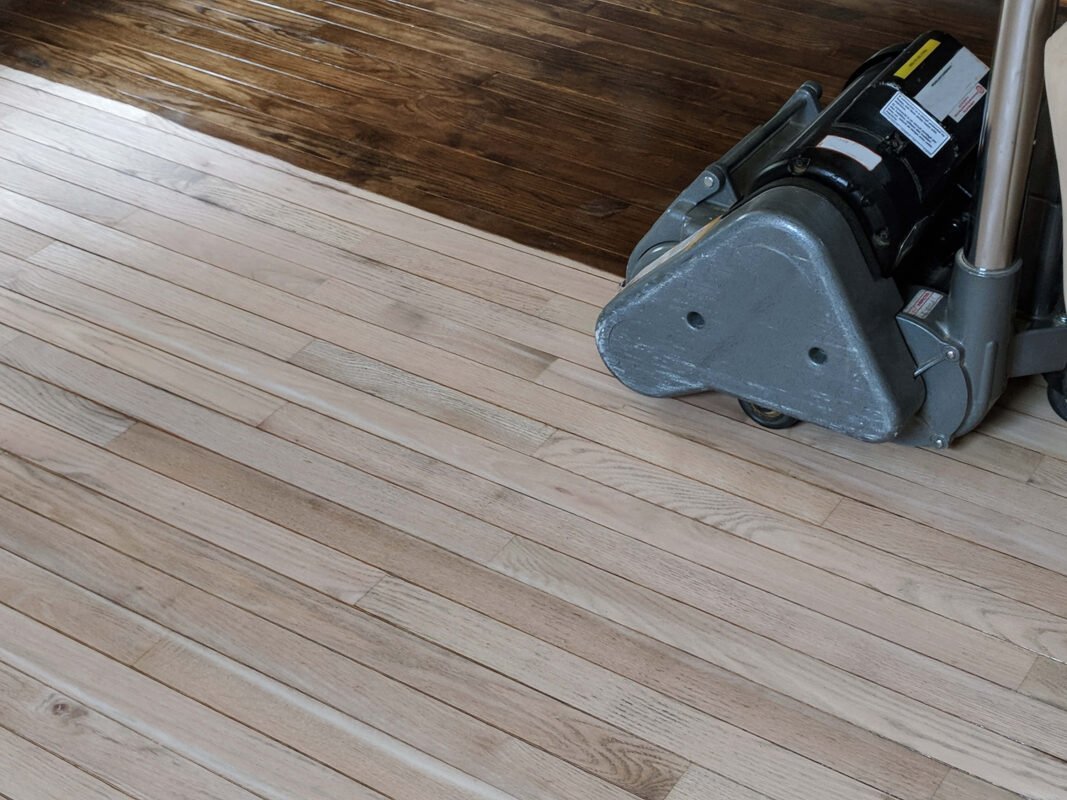
How to Use a Drum Sander
The drum sander will be equipped with a handle that may be removed in order to facilitate easy transportation. Always keep a close watch on the dust bag and double-check that this is completely fastened whenever you remove it from its location. Because doing so would compromise one’s safety, the container must be discarded after it has been used to its maximum capacity. There will be arrows on your sander showing you where you should insert the sandpaper, and you need to follow these arrows in order to achieve the best results.
The thickness of a floor may not be sufficient for another drum sanding if it has already been sanded down extensively. Inconspicuously measuring the thickness of the floor around radiator pipes is an excellent place to start looking for potential floor penetrations. You should know that the edging of the floor may not have been sanded with the same vigor as the rest of the floor.
Damage to the floor, such as discoloration or deep gouges and scratches, is a common cause for homeowners to resort to drum sanding. Drum-sanding your hardwood floor may not be necessary if this does not describe your flooring. There is a wide range of benefits of drum sanding to be had, but it is not something that you should try unless you’re an expert. There is a considerable probability that drum sanding your first floor will completely damage it.
Floor Sanding by Orbital Sander
Orbital sanders are a good option for sanding hardwood floors when a drum sander isn’t necessary for the job. You could be visualizing a floor polisher or buffer instead of an orbital sander if you see a huge, spinning sheet of sandpaper being used in this process. In contrast to popular belief, the circular motion of an orbital floor sander is not intentional. Like a vibrating sander, it makes rapid, small orbits at a rate of up to 3,650 per minute.
Unlike rotary floor sanders, orbital floor sanders are not as easy to move about. Turn them on, however, and they’ll roll over your floor like butter. Different from a drum sander, you won’t be able to smooth over hardwood floor flaws by planning them down. However, unlike with drum sanders, you won’t risk accidentally gouging deep troughs into your flooring.
Flooring Edgers
When sanding a wooden floor, refinishers also utilize special heavy-duty sanding equipment called flooring edgers, which are a sort of disc sander. The disc is mounted at an incline on the bottom of the heavy housing, with only the leading edge touching the ground.
Wheels attached to the housing’s rear enable the device to be rolled along the ground behind the disc while it does its demolition work. It is important to use caution while using an eager to prevent injury and damage to the floor.
Most Important Situational Aspects
Orbital or drum sander: When opposed to drum sanders, orbital floor sanders are easier to use and manage in terms of their size and weight. Drum sanders are notoriously difficult to operate correctly and have a high risk of gouging the floor.
Hiring Pros: The process of sanding a floor, and especially a drum, may be challenging. If you leave the spinning drum on your floor for even a second longer than necessary, you might permanently damage the surface. Consequently, many would-be do-it-yourself floor sanders wind up hiring refinishing hardwood floor contractors.
Multiple sandings: Sanding a solid hardwood floor may be done numerous times, but the results are not permanent. The structural soundness of the boards may be put in jeopardy if you sand them several times with a high level of vigor, depending on the number of times you sand them.
DIY sanding: The fact that anybody with sufficient drive and a credit card can hire a drum or orbital sander of professional grade from a local rental yard is yet another advantageous element of floor sanding.
Labour-Intense: Sanding your hardwood floors is a reasonably inexpensive option in comparison to completely replacing them, which includes hefty expenditures for both labour and materials. Sanding your hardwood floors is basically what you’ll be paying for when it comes to pricing.
Final Thoughts
In order to provide you with the information you want, we have endeavored to explain the process of floor sanding in this guide in such a manner that it is presented in the simplest and most understandable format possible. As you read and take in the information on the procedure of floor sanding, it is our goal that you will find this knowledge to be beneficial.