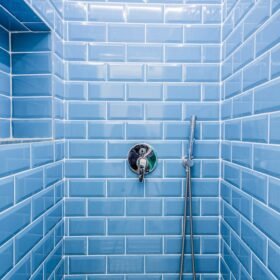
To remove a Kohler shower handle, follow these general steps:. Please note that the specific procedure may vary depending on the model of your Kohler shower handle. Always consult the manufacturer’s instructions or user manual for your specific shower handle, if available. kohler shower handle
Turn off the water supply.
Before starting any work, turn off the water supply to the shower to avoid accidental water flow during the process.
Locate the Set Screw:
Look for a set screw that holds the shower handle in place. This screw is usually located on the underside of the handle or inside a small hole or indentation.
Remove the Set Screw:
Use an appropriate-sized screwdriver or Allen wrench (hex key) to loosen and remove the set screw. Turn the screw counterclockwise until it is completely loose, but do not remove it entirely from the handle.
Pull Off the Handle:
Once the set screw is loose, the handle should be free to slide off the shower valve stem. Gently pull the handle straight outwards from the valve stem.
Inspect for Additional Fasteners:
Some shower handles may have additional fasteners or screws securing the trim plate or escutcheon to the wall. If so, remove these screws using the appropriate tools.
Remove Trim Plate or Escutcheon:
With any additional fasteners removed, carefully pull the trim plate or escutcheon away from the wall. This will expose the shower valve and cartridge behind it.
Optional: Remove the Cartridge:
Depending on your needs (e.g., for repair or replacement), you may need to remove the cartridge from the valve body. Refer to the Kohler manufacturer’s instructions for your specific shower valve model to perform this step correctly.
Replace or Repair as Needed:
If you were removing the handle for maintenance or replacement purposes, follow the reverse steps to install a new handle or address any issues with the existing one.
Always take care while working on plumbing fixtures and ensure that the water supply is turned off before beginning any repairs. If you encounter difficulties or are uncertain about the process, consider seeking the assistance of a professional plumber or a qualified technician to avoid any accidental damage or water leaks.
Clean the Valve Area:
While you have the handle and trim plate removed, take the opportunity to clean the valve area and any visible components. Use a cloth or a mild cleaning solution to remove any dirt or buildup that may have accumulated over time.
Inspect for Wear or Damage:
Check the removed handle, trim plate, and cartridge for any signs of wear or damage. If you notice any issues, such as cracks, corrosion, or malfunctioning parts, it may be time to consider replacing these components.
Reassemble the Shower Handle:
If you removed the cartridge or any other parts, carefully reassemble the shower handle, ensuring all components fit snugly and correctly.
Install the Trim Plate or Escutcheon:
Position the trim plate or escutcheon back onto the wall, aligning it properly with the valve. Secure it in place by tightening any screws or fasteners that were removed earlier.
Slide the Handle Back On:
Slide the shower handle back onto the valve stem. Make sure it fits securely and aligns with the set screw hole.
Tighten the set screw.
With the handle properly positioned, tighten the set screw using the screwdriver or Allen wrench. Turn the screw clockwise until it is firmly secured. kohler shower handle
Turn on the water supply.
Once you have reassembled the shower handle and tightened the set screw, turn on the water supply to the shower.
Test the Handle: (kohler shower handle)
Test the shower handle to ensure it functions correctly. Check for any leaks or issues with the handle’s operation.
If everything looks and works well, your Kohler shower handle removal and reinstallation process should be complete. If you encounter any difficulties, leaks, or other problems, consider reaching out to a professional plumber or contacting Kohler’s customer support for assistance. Properly maintaining and caring for your shower handle will ensure it continues to function effectively and extend its lifespan.


